
精通
英语
和
开源
,
擅长
开发
与
培训
,
胸怀四海
第一信赖
锐英源精品开源心得,转载请注明:“锐英源www.wisestudy.cn,孙老师作品,电话13803810136。”需要全文内容也请联系孙老师。
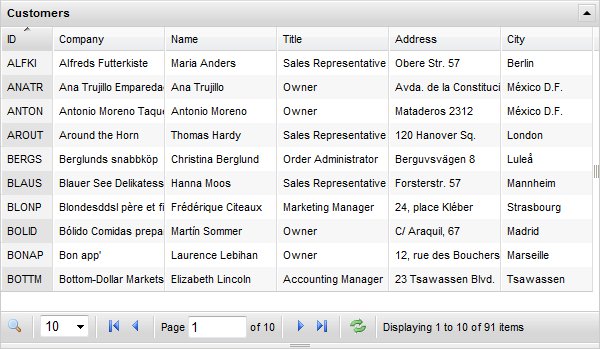
This article will demonstrate, step-by-step, how to create a basic demo application using Microsoft's new ASP.NET MVC framework and Flexigrid. To keep this demo simple, we will not be covering unit testing, input validation, error handling, data encapsulation, authentication, routing, or any other facets of a well designed MVC application.
At the time of publishing this article, ASP.NET MVC saw its first Beta release. In order for ASP.NET MVC and LINQ to SQL to work properly, you'll need to make sure you have VS2008 SP1 and .NET 3.5 SP1 installed. Important: There are several pre-release products such as Microsoft Silverlight Tools Beta 1 which will prevent VS2008 SP1 from installing successfully. Therefore, the VS2008 Service Pack Preparation Tool should be run prior to installing VS2008 SP1.
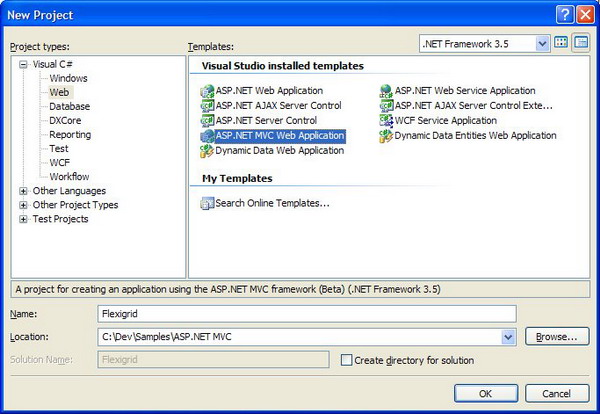
The first step is to create a new ASP.NET MVC Web Application project.
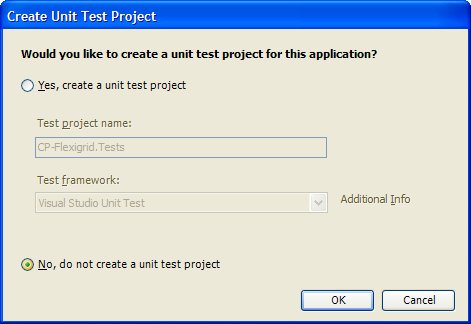
For this sample, we will not be covering unit testing, so select No in the Create Unit Test Project dialog.
Now that a skeleton project has been created, we can do a bit of cleanup. Let's remove a few of the items we won't be using for this sample.
<title></title>
<body>
<div class="page">
<div id="main">
<asp:ContentPlaceHolder ID="MainContent" runat="server" />
</div>
</div>
</body>
Once the cleanup is complete, the project should look like the following:
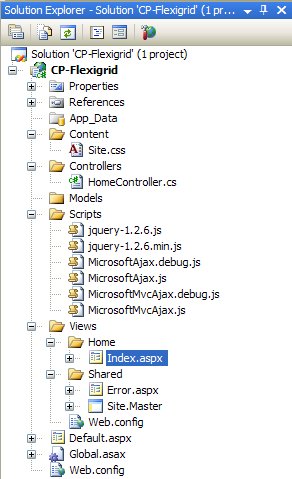
Go ahead and debug the application now, and make sure everything runs OK.
Next, place a copy of Northwind.mdf and Northwind_log.ldf in the App_Data folder. Right-click the App_Data folder in VS and select Add Existing Item, and locate the Northwind.mdf file, then click OK. When doing this, VS2008 will automatically update the web.config file with a connection string for the database named NorthwindConnectionString.
Now, lets create a data access layer using LINQ to SQL. Right-click the Models folder in VS and select Add New Item, and create a LINQ to SQL class named Customer, then click Add.
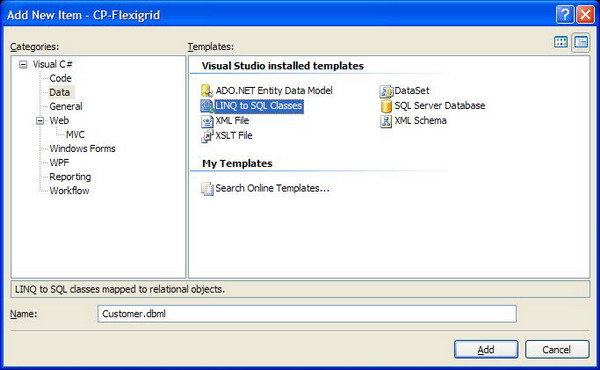
Double-click the Northwind.mdf file to open the Object Relational Designer. Find the Customers table and drag it onto the designer page to create the data access layer. Click Save, then re-open the Solution Explorer, and you should now have a Customer.dbml file in the Models folder. This file contains the data context for accessing the database, and is automatically generated by LINQ to SQL. For the Customer data class, the data context will be called CustomerDataContext. We'll need to add a using Flexigrid.Models before accessing the CustomerDataContext class.