
精通
英语
和
开源
,
擅长
开发
与
培训
,
胸怀四海
第一信赖
精通
英语
和
开源
,
擅长
开发
与
培训
,
胸怀四海
第一信赖
锐英源精品开源,禁止转载和任何形式的非法内容使用,违者必究
本文是以解析JSON为核心的一个全面性质的Demo,对学习安卓界面开发和类设计也有明显帮助。
JSON(JavaScript对象表示法)是一种独立于语言的数据格式,它使用人类可读的文本传输数据对象,这些数据对象由键值对组成的。
在本教程中,我们将解释JSON响应结构以及如何解析响应以获取所需信息。为了解释这个概念,我们将使用两个示例JSON响应:
{"rom":"32GB","screenSize":"5.5 inch","backCamera":"21MP","companyName":"Motorola","name":"Moto X Play","frontCamera":"5MP","battery":"3630mAH","operatingSystem":"Android 5.1","processor":"1.8GHz","url":"http://www.androidtutorialpoint.com/api/motorola_moto_x_play","ram":"2GB"}
这些链接分别包含服务于JSON数组和JSON对象的示例JSON响应。在开始构建应用程序之前,让我们深入讲解下JSON响应的结构。
[
{
"rom":"32GB",
"screenSize":"5.5 inch",
"backCamera":"21MP",
"companyName":"Motorola",
"name":"Moto X Play",
"frontCamera":"5MP",
"battery":"3630mAH",
"operatingSystem":"Android 5.1",
"processor":"1.8GHz",
"url":"http://www.androidtutorialpoint.com/api/motorola_moto_x_play",
"ram":"2GB"
},
{
"rom":"8GB",
"screenSize":"4 inch",
"backCamera":"5MP",
"companyName":"Samsung",
"name":"Galaxy S Duos 3",
"frontCamera":"0.3MP",
"battery":"1500mAH",
"operatingSystem":"Android 4.4",
"processor":"1.2GHz",
"url":"http://www.androidtutorialpoint.com/api/samsung_galaxy_s_dous_3",
"ram":"512MB"},{"rom":"64GB",
"screenSize":"4.7 inch",
"backCamera":"12MP",
"companyName":"Apple",
"name":"Iphone 6S",
"frontCamera":"5MP",
"battery":"1715mAH",
"operatingSystem":"iOS 9",
"processor":"1.84GHz",
"url":"http://www.androidtutorialpoint.com/api/apple_iphone_6s",
"ram":"2GB"
},
{
"rom":"16GB",
"screenSize":"5.2 inch",
"backCamera":"12.3MP",
"companyName":"LG",
"name":"Nexus 5X",
"frontCamera":"5MP",
"battery":"1500mAH",
"operatingSystem":"Android 6",
"processor":"1.8GHz",
"url":"http://www.androidtutorialpoint.com/api/lg_nexus_5x",
"ram":"2GB"
}
]
如上所述,JSON响应可以具有以下元素:
Android提供以下类来操纵JSON响应:
JSONObject, JSONArray,JSONStringer和JSONTokener。本教程我们将谈论org.json.JSONObject和org.json.JSONArray。
要解析JSON响应,首先确定您感兴趣的JSON响应中的字段。例如,在上面链接中给出的JSON中,我们将使用所有字段。我们必须相应地编写我们的解析函数。
让我们一步一步来制作一个示例JSON解析应用程序。我们将演示如何解析JSON对象和JSON数组。在这个应用程序中,我们将从给定URL中提供的JSON字符串中检索移动电话的详细信息,然后将它们显示为列表,单击每个单独的Mobile时,将显示移动设备的详细信息。
先决条件
创建一个新项目
一个新的项目将被创建,gradle将解决所有的依赖关系。
接下来创建一个移动类。Mobile class表示移动模型,即它包含Mobile 所需的所有字段和方法(getter和setter)。因此,创建一个新的Java类Mobile.java并在其中放入以下代码。
Mobile.java
public class Mobile implements Serializable{
private String mName;
private String mCompanyName;
private String mOperatingSystem;
private String mProcessor;
private String mRam;
private String mRom;
private String mFrontCamera;
private String mBackCamera;
private String mScreenSize;
private String mBattery;
private String mUrl;
public String getName() {
return mName;
}
public void setName(String mName) {
this.mName = mName;
}
public String getCompanyName() {
return mCompanyName;
}
public void setCompanyName(String mCompanyName) {
this.mCompanyName = mCompanyName;
}
public String getOperatingSystem() {
return mOperatingSystem;
}
public void setOperatingSystem(String mOperatingSystem) {
this.mOperatingSystem = mOperatingSystem;
}
public String getProcessor() {
return mProcessor;
}
public void setProcessor(String mProcessor) {
this.mProcessor = mProcessor;
}
public String getRam() {
return mRam;
}
public void setRam(String mRam) {
this.mRam = mRam;
}
public String getRom() {
return mRom;
}
public void setRom(String mRom) {
this.mRom = mRom;
}
public String getFrontCamera() {
return mFrontCamera;
}
public void setFrontCamera(String mFrontCamera) {
this.mFrontCamera = mFrontCamera;
}
public String getBackCamera() {
return mBackCamera;
}
public void setBackCamera(String mBackCamera) {
this.mBackCamera = mBackCamera;
}
public String getScreenSize() {
return mScreenSize;
}
public void setScreenSize(String mScreenSize) {
this.mScreenSize = mScreenSize;
}
public String getBattery() {
return mBattery;
}
public void setBattery(String mBattery) {
this.mBattery = mBattery;
}
public String getUrl() {
return mUrl;
}
public void setUrl(String mUrl) {
this.mUrl = mUrl;
}
}
我们正在实现Serializable接口,因为我们将把Mobile对象从一个活动传递到另一个活动。
接下来,创建两个函数 parseFeed()和parseArrayFeed()并分别解析JSONObject, JSONArray。在解析JSON响应时,我们可能会得到一个org.json.JSONException因此我们将在try/ catch块中编写解析逻辑。
parseFeed()取JSONObject作为参数,并设置移动对象的所有属性。
JSONParser.java
import org.json.JSONArray;
import org.json.JSONException;
import org.json.JSONObject;
import java.util.ArrayList;
public class JSONParser {
public static ArrayList<Mobile> mMobiles = new ArrayList<>();
public static Mobile parseFeed(JSONObject obj) {
try {
Mobile mobile = new Mobile();
mobile.setName(obj.getString("name"));
mobile.setCompanyName(obj.getString("companyName"));
mobile.setOperatingSystem(obj.getString("operatingSystem"));
mobile.setProcessor(obj.getString("processor"));
mobile.setBackCamera(obj.getString("backCamera"));
mobile.setFrontCamera(obj.getString("frontCamera"));
mobile.setRam(obj.getString("ram"));
mobile.setRom(obj.getString("rom"));
mobile.setScreenSize(obj.getString("screenSize"));
mobile.setUrl(obj.getString("url"));
mobile.setBattery(obj.getString("battery"));
return mobile;
} catch (JSONException e1) {
e1.printStackTrace();
return null;
}
}
parseArrayFeed()取JSONArray作为参数并返回Mobile的ArrayList。
JSONParser.java
for(int i = 0;i<arr.length();i++) {
obj = arr.getJSONObject(i);
mobile= new Mobile();
mobile.setName(obj.getString("name"));
mobile.setCompanyName(obj.getString("companyName"));
mobile.setOperatingSystem(obj.getString("operatingSystem"));
mobile.setProcessor(obj.getString("processor"));
mobile.setBackCamera(obj.getString("backCamera"));
mobile.setFrontCamera(obj.getString("frontCamera"));
mobile.setRam(obj.getString("ram"));
mobile.setRom(obj.getString("rom"));
mobile.setScreenSize(obj.getString("screenSize"));
mobile.setUrl(obj.getString("url"));
mobile.setBattery(obj.getString("battery"));
mMobiles.add(mobile);
}
return mMobiles;
} catch (JSONException e1) {
e1.printStackTrace();
return null;
}
}
}
打开AndroidManifest.xml并输入以下代码,永远记得根据你的公司域更改软件包名称。我们已经添加了,android.permission.INTERNET因为我们将通过网络请求JSON数据。
AndroidManifest.xml中
package="com.androidtutorialpoint.jsonparser" >
<uses-permission android:name="android.permission.INTERNET"/>
<application
android:allowBackup="true"
android:icon="@mipmap/ic_launcher"
android:label="@string/app_name"
android:supportsRtl="true"
android:theme="@style/AppTheme" >
<activity android:name=".JSONParseActivity" >
<intent-filter>
<action android:name="android.intent.action.MAIN" />
<category android:name="android.intent.category.LAUNCHER" />
</intent-filter>
</activity>
<activity android:name=".ParseJSONArray" >
</activity>
<activity android:name=".ParseJSONObject" >
</activity>
<activity android:name=".ParseJSONArrayObject" >
</activity>
</application>
</manifest>
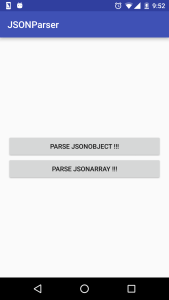
我们创建一个JSONParseActivity,它由两个Button组成,以决定是否解码 JSONObject或 JSONArray,如图所示。
将以下代码放入JSONParseActivity:
JSONParseActivity.java
import android.content.Intent;
import android.support.v7.app.AppCompatActivity;
import android.os.Bundle;
import android.view.View;
import android.widget.Button;
public class JSONParseActivity extends AppCompatActivity {
private Button button_getJSONObject;
private Button button_getJSONArray;
private final String EXTRA_JSON_OBJECT_INDEX = "com.androidtutorialpoint.jsonparser";
@Override
protected void onCreate(Bundle savedInstanceState) {
super.onCreate(savedInstanceState);
setContentView(R.layout.activity_jsonparse);
button_getJSONObject = (Button) findViewById(R.id.button_jsonobject);
button_getJSONArray = (Button) findViewById(R.id.button_jsonarray);
button_getJSONObject.setOnClickListener(new View.OnClickListener() {
@Override
public void onClick(View v) {
Intent i = new Intent(getApplication(), ParseJSONObject.class);
i.putExtra(EXTRA_JSON_OBJECT_INDEX, 0);
startActivity(i);
}
});
button_getJSONArray.setOnClickListener(new View.OnClickListener() {
@Override
public void onClick(View v) {
Intent i = new Intent(getApplication(), ParseJSONArray.class);
startActivity(i);
}
});
}
}
在上面的活动中,我们已经对两个按钮定义setOnClickListener,我们分别调用ParseJSONObject.java和ParseJSONArray.java。以下是布局文件JSONParseActivity:
activity_jsonparse.xml
xmlns:tools="http://schemas.android.com/tools"
android:orientation="vertical"
android:layout_width="match_parent"
android:layout_height="match_parent"
android:paddingLeft="@dimen/activity_horizontal_margin"
android:paddingRight="@dimen/activity_horizontal_margin"
android:paddingTop="@dimen/activity_vertical_margin"
android:paddingBottom=
"@dimen/activity_vertical_margin" tools:context=".MainActivity"
android:gravity="center">
<Button
android:id="@+id/button_jsonobject"
android:layout_width="match_parent"
android:layout_height="wrap_content"
android:text="Parse JSONObject !!!"/>
<Button
android:id="@+id/button_jsonarray"
android:layout_width="match_parent"
android:layout_height="wrap_content"
android:text="Parse JSONArray !!!"/>
</LinearLayout>
我们先来谈谈ParseJSONObject.java。此活动显示从MobileJSONObject URL中检索的移动设备的详细信息,并显示移动设备的所有规格以及图像。创建一个Java类ParseJSONObject.java并粘贴以下代码。
ParseJSONObject.java
import android.app.Activity;
import android.app.ProgressDialog;
import android.os.Bundle;
import android.support.v7.app.AppCompatActivity;
import android.util.Log;
import android.widget.ImageView;
import android.widget.TextView;
import android.widget.TextView;
import com.android.volley.Request.Method;
import com.android.volley.Response;
import com.android.volley.VolleyError;
import com.android.volley.VolleyLog;
import com.android.volley.toolbox.ImageLoader;
import com.android.volley.toolbox.JsonObjectRequest;
import com.android.volley.toolbox.Volley;
import org.json.JSONObject;
public class ParseJSONObject extends AppCompatActivity {
private static final String TAG ="ParseJSONObject";
private final String EXTRA_JSON_OBJECT_INDEX = "com.androidtutorialpoint.jsonparser";
private Mobile mMobile;
private TextView nameTextView;
private TextView companyNameTextView;
private TextView operatingSystemTextView;
private TextView processorTextView;
private TextView ramTextView;
private TextView romTextView;
private TextView frontCameraTextView;
private TextView backCameraTextView;
private TextView screenSizeTextView;
private TextView batteryTextView;
private ImageView photoImageView;
private String photoUrl;
String url = "http://androidtutorialpoint.com/api/MobileJSONObject.json";
@Override
protected void onCreate(Bundle savedInstanceState) {
super.onCreate(savedInstanceState);
setContentView(R.layout.activity_parsejsonobject);
nameTextView =(TextView)findViewById(R.id.edit_text_name);
companyNameTextView =(TextView)findViewById(R.id.edit_text_company_name);
operatingSystemTextView =(TextView)findViewById(R.id.edit_text_operating_system);
processorTextView = (TextView)findViewById(R.id.edit_text_processor);
ramTextView = (TextView)findViewById(R.id.edit_text_ram);
romTextView = (TextView)findViewById(R.id.edit_text_rom);
frontCameraTextView = (TextView)findViewById(R.id.edit_text_front_camera);
backCameraTextView = (TextView)findViewById(R.id.edit_text_back_camera);
screenSizeTextView = (TextView)findViewById(R.id.edit_text_screen_size);
batteryTextView = (TextView)findViewById(R.id.edit_text_battery);
photoImageView = (ImageView)findViewById(R.id.image_view_mobile_picture);
final ProgressDialog pDialog = new ProgressDialog(ParseJSONObject.this);
pDialog.setMessage("Loading...");
pDialog.show();
JsonObjectRequest jsonObjReq =
new JsonObjectRequest(Method.GET,url, null,new Response.Listener<JSONObject>() {
@Override
public void onResponse(JSONObject response) {
mMobile = JSONParser.parseFeed(response);
nameTextView.setText
("Name :" + mMobile.getName());
companyNameTextView.setText
("Company :" + mMobile.getCompanyName());
operatingSystemTextView.setText
(" OS :" + mMobile.getOperatingSystem());
processorTextView.setText
("Processor :" + mMobile.getProcessor());
ramTextView.setText
("RAM :"+mMobile.getRam());
romTextView.setText
("Memory :"+mMobile.getRom());
frontCameraTextView.setText
("Front Camera :"+mMobile.getFrontCamera());
backCameraTextView.setText
("Rear Camera :"+mMobile.getBackCamera());
screenSizeTextView.setText
("Screen Size :"+mMobile.getScreenSize());
batteryTextView.setText
("Battery :"+mMobile.getBattery());
photoUrl = (mMobile.getUrl());
ImageLoader imageLoader =
new ImageLoader(Volley.newRequestQueue(getApplicationContext()),
new LruBitmapCache());
// If you are using normal ImageView
imageLoader.get(photoUrl, new ImageLoader.ImageListener() {
@Override
public void onErrorResponse(VolleyError error) {
Log.e(TAG, "Image Load Error: " +
error.getMessage());
}
@Override
public void onResponse
(ImageLoader.ImageContainer response, boolean arg1) {
if (response.getBitmap() != null) {
// load image into imageview
photoImageView.setImageBitmap(response.getBitmap());
pDialog.hide();
}
}
});
Log.d(TAG, response.toString());
}
}, new Response.ErrorListener() {
@Override
public void onErrorResponse(VolleyError error) {
VolleyLog.d(TAG, "Error: " + error.getMessage());
// hide the progress dialog
pDialog.hide();
}
});
// Adding request to request queue
Volley.newRequestQueue(getApplicationContext()).add(jsonObjReq);
}
}
代码非常简单。
上述活动的布局如下:
activity_parsejsonobject.xml
android:layout_width="match_parent"
android:layout_height="match_parent"
xmlns:android="http://schemas.android.com/apk/res/android" >
<LinearLayout xmlns:android="http://schemas.android.com/apk/res/android"
xmlns:tools="http://schemas.android.com/tools"
android:layout_width="match_parent"
android:layout_height="match_parent"
android:orientation="vertical"
android:scrollbars="vertical"
android:paddingLeft="@dimen/activity_horizontal_margin"
android:paddingRight="@dimen/activity_horizontal_margin"
android:paddingTop="@dimen/activity_vertical_margin"
android:paddingBottom="@dimen/activity_vertical_margin"
tools:context=".MainActivity"
android:gravity="center">
<ImageView
android:id="@+id/image_view_mobile_picture"
android:layout_width="200dp"
android:layout_height="200dp" />
<TextView
android:id="@+id/edit_text_name"
android:layout_width="match_parent"
android:layout_height="wrap_content"
android:text="Model :"
android:layout_marginTop="16dp"
android:layout_centerHorizontal="true"
/>
<TextView
android:id="@+id/edit_text_company_name"
android:layout_width="match_parent"
android:layout_height="wrap_content"
android:text="Company :"
android:layout_marginTop="16dp"
android:layout_centerHorizontal="true"
/>
<TextView
android:id="@+id/edit_text_operating_system"
android:layout_width="match_parent"
android:layout_height="wrap_content"
android:text="OS :"
android:layout_marginTop="16dp"
android:layout_centerHorizontal="true"
/>
<TextView
android:id="@+id/edit_text_processor"
android:layout_width="match_parent"
android:layout_height="wrap_content"
android:text="Processor :"
android:layout_marginTop="16dp"
android:layout_centerHorizontal="true"
/>
<TextView
android:id="@+id/edit_text_ram"
android:layout_width="match_parent"
android:layout_height="wrap_content"
android:text="RAM :"
android:layout_marginTop="16dp"
android:layout_centerHorizontal="true"
/>
<TextView
android:id="@+id/edit_text_rom"
android:layout_width="match_parent"
android:layout_height="wrap_content"
android:text="Memory :"
android:layout_marginTop="16dp"
android:layout_centerHorizontal="true"
/>
<TextView
android:id="@+id/edit_text_front_camera"
android:layout_width="match_parent"
android:layout_height="wrap_content"
android:text="Front Camera :"
android:layout_marginTop="16dp"
android:layout_centerHorizontal="true"
/>
<TextView
android:id="@+id/edit_text_back_camera"
android:layout_width="match_parent"
android:layout_height="wrap_content"
android:text="Rear Camera :"
android:layout_marginTop="16dp"
android:layout_centerHorizontal="true"
/>
<TextView
android:id="@+id/edit_text_screen_size"
android:layout_width="match_parent"
android:layout_height="wrap_content"
android:text="Screen Size :"
android:layout_marginTop="16dp"
android:layout_centerHorizontal="true"
/>
<TextView
android:id="@+id/edit_text_battery"
android:layout_width="match_parent"
android:layout_height="wrap_content"
android:text="Battery :"
android:layout_marginTop="16dp"
android:layout_centerHorizontal="true"
/>
</LinearLayout>
</ScrollView>
布局也很简单。我们已经ScrollView内附一个LinearLayout,以支持滚动。我们有一个ImageView和一些TextView作为LinearLayout子控件显示有关移动信息。
接下来,创建一个Java类ParseJSONArray来承载Fragment,Fragment将从JSON Array URL看列出手机。把下面的代码放在里面:
ParseJSONArray.java
为ParseJsonArray活动创建布局资源文件。它只包含一个FrameLayout,是Fragment的容器。
activity_parsejsonarray.xml
<?xml version="1.0" encoding="utf-8"?>
<FrameLayout xmlns:android="http://schemas.android.com/apk/res/android"
android:layout_width="match_parent"
android:layout_height="match_parent"
android:id="@+id/fragmentContainer"
android:paddingBottom="50dp"
/>
创建一个ListMobilesJava类,它将显示移动设备列表。
ListMobiles.java
import android.app.ProgressDialog;
import android.content.Context;
import android.content.Intent;
import android.os.Bundle;
import android.support.v4.app.Fragment;
import android.support.v4.app.ListFragment;
import android.util.Log;
import android.view.LayoutInflater;
import android.view.View;
import android.view.ViewGroup;
import android.widget.ArrayAdapter;
import android.widget.GridView;
import android.widget.ImageView;
import android.widget.TextView;
import com.android.volley.Response;
import com.android.volley.VolleyError;
import com.android.volley.VolleyLog;
import com.android.volley.toolbox.JsonArrayRequest;
import com.android.volley.toolbox.Volley;
import org.json.JSONArray;
import java.util.ArrayList;
public class ListMobiles extends ListFragment {
private final String TAG = "ListMobiles";
private ArrayList<Mobile> mMobileList;
String url = "http://androidtutorialpoint.com/api/MobileJSONArray.json";
private final String EXTRA_JSON_OBJECT = "mobileObject";
@Override
public void onCreate(Bundle savedInstanceState){
super.onCreate(savedInstanceState);
final ProgressDialog pDialog = new ProgressDialog(getActivity());
pDialog.setMessage("Loading...");
pDialog.show();
JsonArrayRequest jsonArrayReq = new JsonArrayRequest(url,
new Response.Listener<JSONArray>() {
@Override
public void onResponse(JSONArray response) {
Log.d(TAG,response.toString());
Log.d(TAG,"Len "+response.length());
mMobileList = JSONParser.parseArrayFeed(response);
pDialog.hide();
MobileAdapter adapter = new MobileAdapter(mMobileList);
setListAdapter(adapter);
}
}, new Response.ErrorListener() {
@Override
public void onErrorResponse(VolleyError error) {
VolleyLog.d(TAG, "Error: " + error.getMessage());
// hide the progress dialog
pDialog.hide();
}
});
// Adding request to request queue
Volley.newRequestQueue(getActivity()).add(jsonArrayReq);
}
private class MobileAdapter extends ArrayAdapter<Mobile> {
public MobileAdapter(ArrayList<Mobile> mobiles) {
super(getActivity(), 0, mobiles);
}
@Override
public View getView(final int position, View convertView, ViewGroup parent) {
// If we weren't given a view, inflate one
Log.d(TAG,"pos "+position);
if (convertView == null) {
convertView = getActivity().getLayoutInflater()
.inflate(R.layout.category_list_item_1, null);
}
Mobile c = mMobileList.get(position);
TextView nameTextView =
(TextView) convertView.findViewById(R.id.textview_name);
nameTextView.setText(c.getName());
nameTextView.setOnClickListener(new View.OnClickListener() {
@Override
public void onClick(View v) {
Intent i = new Intent(getActivity(),ParseJSONArrayObject.class);
Bundle args = new Bundle();
//args.putSerializable(EXTRA_JSON_MOBILE_OBJECT, mMobileList.get(position));
i.putExtra(EXTRA_JSON_OBJECT, mMobileList.get(position));
startActivity(i);
}
});
return convertView;
}
}
}
在上面的代码中,我们创建了一个自定义ArrayAdapter来支持列出Mobiles:
我们将通过填充以下布局来显示条目。因此,创建一个布局资源文件category_list_item_1.xml。为了避免复杂性,我们保持这种布局,我们只是使用TextView里面的 LinearLayout。
category_list_item_1.xml
xmlns:tools="http://schemas.android.com/tools"
android:layout_width="match_parent"
android:layout_height="match_parent"
android:orientation="vertical"
android:gravity="center">
<TextView xmlns:android="http://schemas.android.com/apk/res/android"
android:padding="10dp"
android:id="@+id/textview_name"
android:layout_width="match_parent"
android:layout_height="wrap_content"
android:textStyle="bold"
></TextView>
</LinearLayout>
现在,让我们来谈谈ParseJSONArrayObject类,它在单击MobileList内某个项目时被调用。创建一个Java ParseJSONArrayObject类并输入以下代码。
ParseJSONArrayObject.java
此活动与ParseJSONObject活动类似,但在此处我们正在接收移动对象Bundle。
在该onCreate方法中:
另外,创建新的Java类LruBitmapCache.java。该类用作Volley中Image Loader的缓存。
LruBitmapCache.java
import android.graphics.Bitmap;
import android.support.v4.util.LruCache;
import com.android.volley.toolbox.ImageLoader.ImageCache;
public class LruBitmapCache extends LruCache<String, Bitmap> implements
ImageCache {
public static int getDefaultLruCacheSize() {
final int maxMemory = (int) (Runtime.getRuntime().maxMemory() / 1024);
final int cacheSize = maxMemory / 8;
return cacheSize;
}
public LruBitmapCache() {
this(getDefaultLruCacheSize());
}
public LruBitmapCache(int sizeInKiloBytes) {
super(sizeInKiloBytes);
}
@Override
protected int sizeOf(String key, Bitmap value) {
return value.getRowBytes() * value.getHeight() / 1024;
}
@Override
public Bitmap getBitmap(String url) {
return get(url);
}
@Override
public void putBitmap(String url, Bitmap bitmap) {
put(url, bitmap);
}
}